Tuesday 17 September 2013

Chocolate and Ginger Cupcakes

Rich and chocolatey and warm and spicy, with plenty of soft icing, these are a delicious tea time treat.
Equipment -
2 x muffin tins, lined with 14 - 16 paper cases
Electric whisk
Sugar thermometer

Ingredients -
Sponge -
70g butter, softened
170g plain flour
250g caster sugar
50g cocoa powder
1 tbsp baking powder
1 tsp ground ginger
1/2 tsp salt
210ml whole milk
2 large, free range eggs
4 balls stem ginger, finely chopped

Icing -
170g caster sugar
8 tbsp water
4 free range egg yolks
300g butter, softened
150g dark chocolate, melted

Method -
Sponge -
1. Preheat oven to 170C / 325F / gas 3
2. Put all the ingredients in a large bowl and whisk until you have a smooth batter.
3. Divide between the paper cases in the muffin trays, I use a 50ml ice cream scoop.
4. Bake for 20-25 mins, until the cupcakes are springy to the touch.
5. Remove to a wire rack and leave to cool.

Icing -
1. Put the sugar and water in a small pan and heat slowly until the sugar dissolves.
2. Bring to the boil and boil until it reaches 110C on a sugar thermometer.  Don't let the syrup start to caramelize.
3. Meanwhile, put the egg yolks into a bowl and briefly whisk, then pour the hot syrup into the bowl in a thin, steady stream, whisking continuously.  Keep whisking until the mixture becomes pale, mousse like and completely cold.
4. Gradually whisk in the butter, followed by the melted chocolate.

To assemble -
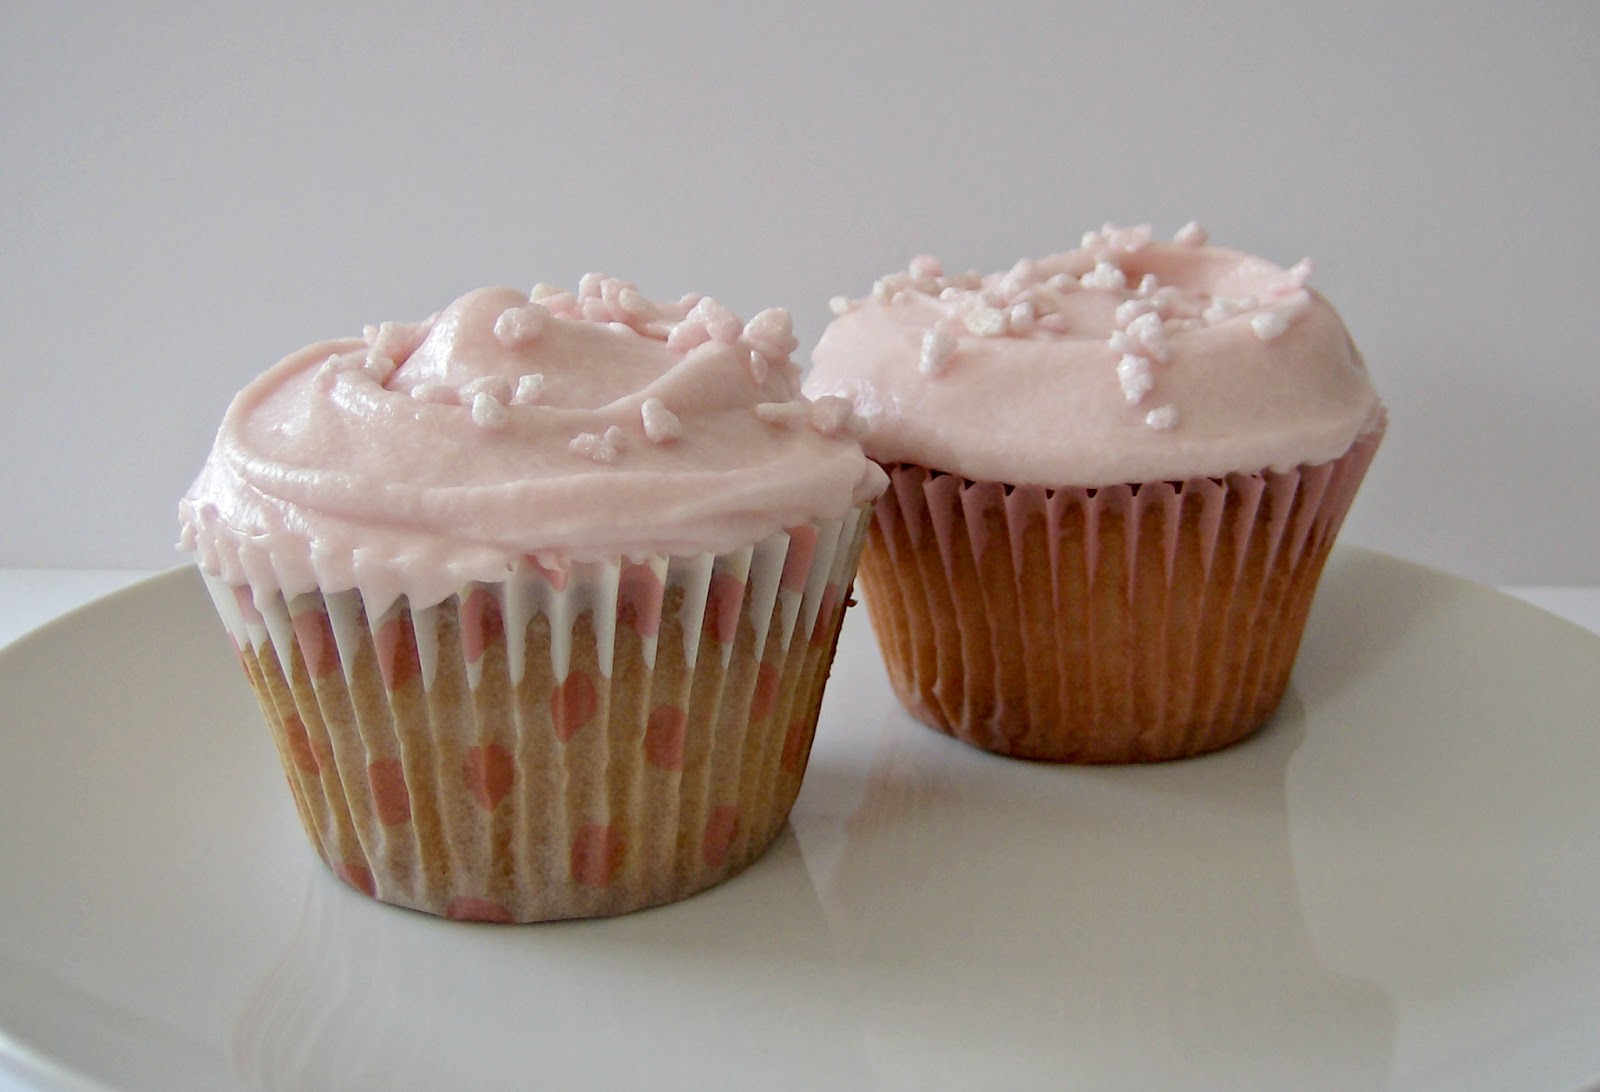
Pipe or swirl the icing onto the cupcakes and decorate with crystallized ginger.

Tuesday 10 September 2013

Mocha Marble Loaf

Coffee and chocolate sponges, marbled together and studded with chocolate chips, then glazed with a white chocolate ganache, perfect with a cuppa, and so easy to make.
Equipment -
900g loaf tin, lined
Electric whisk

Ingredients -
Sponge -
200g butter, softened
250g caster sugar
1 tsp vanilla extract
4 large, free range eggs, beaten
250g self-raising flour
Pinch of salt
2 tbsp dark chocolate chips

30g cocoa powder & 2 tbsp milk for the chocolate mix

1 tbsp instant coffee powder, dissolved in 1 tbsp boiling water for the coffee mix

Ganache -
100g white chocolate, finely chopped
100mls double cream
20g butter, diced

Method
Sponge -
1. Preheat oven to 180C / 350F / gas 4
2. Put butter in large bowl and beat until creamy.  Gradually beat in sugar, then vanilla, and continue to beat until mix is very pale and fluffy.
3. Gradually add the eggs, a tablespoon at a time, if the mix looks like it's about to curdle, add a tablespoon or two of the flour.
4. Sift the flour and salt into the bowl and gently fold in.
5. Divide the mixture into two bowls and add the coffee liquid to one, mixing well, and sifting the cocoa and adding the milk and mixing well to the other.
6. Add alternate spoonfuls of each mixture to the lined tin, scattering in the chocolate chips as you work.
7. Bang the tin on the work to a couple of times to expel air, then, using a round bladed knife, swirl it through the mixture to marble it.
8. Bake for an 1- 1 1/4 hours until the cake is well risen and a skewer inserted in to the middle comes out clean.
9. Leave to cool in the tin for 20 mins, then remove to a wire tray and leave to cool completely before icing.

Ganache -
1. Place finely chopped chocolate and butter in a bowl.
2. Heat cream, almost to the boil, then pour over the chocolate and butter.  Leave to stand for a few mins, then stir gently until smooth.  Don't over mix or it my separate.
3. Leave to cool until it reaches a thick pouring consistency.

To assemble -
Level the top of the cake if you wish using a sharp knife, pour over the glaze and dust with cocoa powder.

Tuesday 3 September 2013

Gingery Plum Cake

Really easy to make and so good to eat!  Delicious served with a generous dollop of Chantilly cream.
It's a BBC Good Food recipe again, here's the link. It's a kind of upside-down cake made with plums, and a melt and mix gingerbread sponge.

Tuesday 27 August 2013

Deep Filled Victoria Sandwich

This cake is made with a slightly more time consuming method than the standard creaming method, the eggs are added very slowly and the flour is double sifted and folded in, but, it gives a fantastic light, well risen and even result, it's well worth a try, your friends and family will thank you for it. 
I've used special cake tins with raised inserts so that the cake can be deep filled, but this mix will work just as well in standard sandwich tins, you just won't be able to be quite a generous with the filling.
I know cream isn't traditional in a Victoria sponge, but who doesn't like a cream cake?!
Equipment -
2 x hidden centre sandwich tins, well greased with cake tin release (both products available from Lakeland) or 2 x 25.5cm sandwich tins, greased and base lined.
Electric whisk.

Ingredients -
225g butter, softened
225g caster sugar
4 large free range eggs
1/2 tsp vanilla bean paste
225g self raising flour, sifted
1 tbsp milk
Jam of your choice for filling, I used home made raspberry and rose
Whipped cream for filling, I used Chantilly cream (sweetened with icing sugar and flavoured with vanilla)
Caster or icing sugar for dusting

Method
1. Preheat oven to 180C / 350F / gas 4
2. Put butter in a large bowl and beat until creamy.
3. Gradually beat in sugar, then keep beating until the mix turns almost white and becomes very fluffy, this will take 3-4 mins.
4. Break eggs into a small bowl and add vanilla.  beat lightly with a fork.  Add to the creamed mixture a tablespoon at a time, beating well after each addition.  If the mixture looks like it's about to curdle, add a tablespoon of the sifted flour.  This process will take about 5 mins, don't rush it as it will give your cake great texture.
5. Sift the flour again, this time into the mixture, and add the milk.  Gently fold into the creamed mixture, taking care not to knock out the air you've beaten in.
6. Divide the batter between the two tins, spreading it evenly to the edges, and bake for 20-25 min, until golden brown and springy to the touch.
7. Leave in the tin for two mins then turn the cakes out onto a wire rack and leave to cool completely.
8. Once cold, fill with jam and cream, and dust the top with caster or icing sugar.

Tuesday 20 August 2013

White Chocolate and Pecan Blondies

These are like brownies, but made with white chocolate and lots of pecan nuts, use really good quality chocolate for the best flavour.  They're really easy to make and will disappear fast!
Equipment -
20.5 cm square tin, greased and base lined with baking paper

Ingredients -
175g white chocolate, broken up
115g butter, diced
100g golden caster sugar
2 medium free range eggs
 1/2 tsp vanilla bean paste
125g plain flour
1/2 tsp baking powder
150g pecan halves

Method -
1. Preheat oven to 180C / 350F / gas 4
2. Put chocolate and butter in a large bowl over a pan of hot water, off the heat, not letting the water touch the bottom of the pan.  Stir frequently until melted.
3. Remove the bowl from the pan and stir in the sugar, don't worry if it looks curdled at this stage.
4.  Leave to cool for 2 mins while you beat the eggs in a small bowl with the vanilla paste until frothy.
5. Add the eggs to the chocolate mixture and beat with a wooden spoon until you have a thick, glossy  batter.
6. Sift in flour and baking powder and mix well.
7. Add 100g of the nuts and mix well.
8. Pour into the repaired tin and spread evenly.  Scatter over the remaining nuts, and bake for 20-25 mins. until a skewer inserted into the cake halfway between the centre and the side of the tin comes out clean.  The centre should still be slightly soft.
9.  Set the tin on a wire rack and leave to cool in the tin.  Once cold, turn out and cut into 16 pieces.

Tuesday 6 August 2013

Giant Jaffa Orange Cake

Like Jaffa Cakes?  You'll love this!  Orange sponge, topped with a a layer of "smashing jaffa orangy bit!", then smothered in chocolate ganache.  I got this recipe in Good Food magazine.
Equipment -
20cm round cake tin, greased and lined with cling film
23cm round cake tin, greased and base lined with baking paper
Electric whisk - optional, you can beat by hand if you prefer

Ingredients -

Jelly -
Juice of 5 large oranges (about 500 mls)
100 g golden caster sugar
6 gelatine leaves

Sponge -
250g butter, softened
300 g golden caster sugar
4 large, free range eggs
100 g full fat natural yogurt
300 g plain flour
2 tsp baking powder
Zest 4 large oranges, use the juice for the jelly

Ganache -
300 ml double cream
300g dark chocolate, or a mix of milk and dark if you prefer, finely chopped

To assemble -
2 tbsp shredless marmalade or apricot jam

Method -

Jelly -
1. Place orange juice and sugar into a small pan and heat gently until sugar has dissolved.
2. Meanwhile, soak gelatine leaves in cold water for a few mins until soft.
3. Remove gelatine from cold water, squeeze out excess water and stir into the warm juice.
4. Pour into the small lined cake tin and chill for at least four hours or overnight.

Sponge -
1. Heat oven to 160C / 140C fan / gas 3
2. Tip all sponge ingredients into a large mixing bowl and beat with an electric whisk until smooth.
3. Spoon into the prepared tin and smooth the surface.
4. Bake for about 55 mins or until a skewer inserted into the centre comes out clean.
5. Cool in the tin for 15 mins, then remove and leave to cool on a wire rack completely.

Ganache -
1. Heat cream in a small pan.
2. Place chocolate in a bowl.
3. Pour the hot cream over the chocolate and stir until smooth.
4. Leave at room temp to cool and thicken to icing consistency.  You can speed this up by putting it in the fridge if you wish, but keep an eye on it to make sure it doesn't go too hard.

To assemble -
1. Heat marmalade or jam in the microwave to make it a little runny, and paint it over the top of the cake.
2. Flip the jelly out of the tin and place it on top of the cake.
3. Top with the ganache, allowing it to fall down the sides.

Monday 22 July 2013

Chocolate and Ginger Macaroons

These are probably my favourite macaroon flavour combo, the bitter chocolate in the filling works so well with the spicy ginger and sweet almond meringue.  These are guaranteed to disappear fast, one just isn't enough!
Makes 16

Equipment -
2 baking sheets lined with baking parchment
Electric whisk
Piping bag fitted with 1 cm plain nozzle

Ingredients -

Shells -
75g ground almonds
115g icing sugar
1 tsp ground ginger
2 large, free range eggs
50g caster sugar

Filling -
25g unsalted butter
1 tbsp stem ginger syrup
85g good quality dark chocolate, broken into pieces
4 tbsp double cream
1 piece stem ginger, finely chopped

Method -

Shells -
1. Put almonds, icing sugar and ground ginger into a food processor and process for 15 secs.
2. Sift mixture into a bowl.
3. Place egg whites in a large bowl and whisk until soft peak stage.
4. Gradually whisk in caster sugar to make a firm, glossy meringue.
5. Using a spatula, fold the almond mixture into the meringue a third at a time.
6. When all the dry ingredients are incorporated, continue to fold the mix until you have a shiny batter with a thick, ribbon like consistency.  Too stiff and your shells will be hard to pipe and will have peaks, too soft and the piped rounds won't hold their shape.
7. Fill the piping bag with the batter and pipe 32 small rounds onto the prepared trays.
8. Lift the baking sheets and bash them on the work top a few times, fairly hard, to remove any air bubbles, this also helps form the frilly foot or "pied".
9. Leave a room temperature for half an hour.
10. Preheat oven to 160C / 325F / gas mark 3
11. Bake for 10-15 mins, until crisp and the base doesn't wobble when peeled gently from the paper.
12. Leave to cool for 10 mins, then remove from the paper and cool completely on a wire rack.

Filling -
1. In a bain marie or in the microwave, melt the butter, ginger syrup and chocolate.
2. Remover from the heat and stir in the cream and stem ginger.
3. Cool for 20 mins, stirring occasionally.
4. Use to sandwich pairs of macaroons together.

Tuesday 16 July 2013

Ice Cream Cone Cakes

The original recipe for these came from Good Food magazine, but I've made a few changes, most notably to the icing, which I think looks much more like a Mr Whippy ice cream than the ones in the mag.  I've also used a cupcake corer and filled the cakes with jam.  The custard powder in the cake mix gives a real vanilla ice cream flavour, and my icing has a lovely, soft whip texture.  Amazingly, the cones don't brown in the oven or go soft, as long as you bake them as soon as they're filled with the cake mix.
These are great fun to make and will delight young and old alike, my sister ate one of these with a huge grin on her face!
Makes 10

Equipment -
10 hole muffin tin
Electric whisk
Sugar thermometer for the icing

Ingredients -

Cakes -
10 flat bottomed ice cream cones, I used Askeys
200g butter, softened
200g plain flour
4 tbsp custard powder
1 tsp vanilla bean paste
200g golden caster sugar
2 large, free range eggs, beaten

Icing -
170g caster sugar
8 tbsp water
4 free range egg yolks
300g butter, soft but not runny
2 tsp vanilla bean paste
Food colouring if you want

Method -
Cakes -
1. Preheat oven to180C / 160C fan / gas 4
2. Sit cones in muffin tin.
3. Put butter, flour, custard powder, vanilla, sugar and eggs in a large bowl and beat with electric whisk.
4. Fill the cones 3/4 full with the cake mix.
5. Bake for about 30 mins, until a skewer inserted into the middle comes out clean.
6. Leave to cool.
7.If the cake mix has risen above the cone, trim it back with a sharp knife once cold.
8. Use a cupcake corer to remove some sponge and fill the hole with jam, I used home made blueberry and elderflower jam.  Cut a thin disc off the removed core and use this a plug for the jammy centre.

Icing -
1. Put the sugar and water in a small heavy-based saucepan and heat gently, without boiling, until the sugar dissolves.
2. Bring to the boil and boil until the temp reaches 110C / 225F on a sugar thermometer, this will take about 5 mins.  Don't let the syrup start to caramelise.
3. Meanwhile, put egg yolks in a bowl and whisk briefly with an electric whisk, then, pour the sugar syrup into the bowl in a thin, slow, steady stream, whisking continuously.
4. Keep whisking until the mixture becomes very thick, mousse-like, pale in colour and completely cold.
5. Gradually whisk in the butter, followed by the vanilla bean paste and food colouring if any.

To decorate -
Using a star nozzle, pipe swirls of icing on top of the cones to look like ice cream, be generous, the recipe gives you plenty icing.  Top with half a flake and hundreds and thousands, or whatever decoration takes your fancy.

Tuesday 9 July 2013

Wimbledon Winners!

Here's a recipe for biscuits full of the flavour of strawberries and cream.  You can use 100g of any flavourings of your choice to ring the changes, the possibilities are endless.
These don't look elegant, but they taste great and they're really easy to make, what's not to like?
Makes 16

Equipment - 3 baking sheets, greased

Ingredients -
125g unsalted butter
100g golden caster sugar
50g light muscovado sugar
1 medium free range egg
1/2 tsp vanilla bean paste
175g plain flour
1/2 tsp baking powder
50g dried strawberries, chopped
50g white chocolate chips

Method -
1. Preheat oven to 190C / 375F / gas 5
2. Gently heat butter in a pan large enough to hold all the ingredients.
3. Remove from the heat and stir in sugars.
4. Beat the egg with vanilla paste and stir into butter and sugar.
5. Sift flour and baking powder into the mixture and mix thoroughly.  If the mix is too runny add a little more flour.
6. Stir in strawberries and chocolate chips.
7. Spoon round blobs onto baking trays, placing well apart as they do spread and bake for 10-12 mins.
8. Remove from trays using a fish slice and leave to cool on wire racks.

Monday 1 July 2013

Key Lime Pie

This one's a Fraser family favourite.  I'm not saying it's the ultimate key lime pie recipe, it's not even made with key limes, but it's easy, tasty and a real crowd pleaser.  I'm a sucker for a biscuit base, this recipe uses Hobnobs as a change from digestives, so there's not even any pastry to make.  There's no food colouring in this, the soft green colour comes from the zest and juice of the four limes used.  It's a BBC Good Food recipe again, you'll find it here.


Monday 24 June 2013

Lighter Lemon Drizzle Cake

Every time I make this all who sample it can't believe it's a lower calorie version, it really does just just as good as it's high fat contemporary, it's so easy to make too and doesn't cost the earth either.  It's moist, sticky, lemony and just 247 cals per slice.  This is one of my husband's favourites, he's a sucker for anything lemony, he can eat several, large slices in one sitting!
It's a BBC Good Food recipe again, so no typing for me, you'll find it here.

Monday 17 June 2013

Strawberry Milkshake Cupcakes

These really do taste like strawberry milkshake, as they're made with milkshake powder, and they got a massive thumbs up from my young son, who declared the icing "spectacular"!
The original idea for these came from a Hummingbird Bakery book, but I've simplified the recipe.

 Makes 16

Equipment -
2 12 hole or, 1 12 hole and 1 6 hole muffin tin, lined with 16 paper cases
Electric whisk

Ingredients -
sponges -
70g butter, softened
210 plain flour
250g caster sugar
1 tbsp baking powder
1/2 tsp salt
210 ml whole milk
2 large, free range eggs
40g strawberry milkshake powder (I used Nesquik)

Icing -
500g icing sugar, sifted
160g butter, softened,
50 ml whole milk
100g strawberry milkshake powder

Method -

Sponges -
1. Preheat oven to 170C, 320F, gas 3.
2. Mix together all the sponge ingredients in a large bowl, using the electric whisk until just combined and there are no lumps.
3. Divide mixture between the 16 paper cases, a 5o ml ice cream scoop is perfect to potion the mix out.
4. Bake for around 20-25 mins, until the cakes are cooked and springy to the touch.
5. Leave in the tins for 5 mins, then remove to a wire cooling rake to cool completely.

Icing -
1. Mix the milk and milkshake powder together in a jug.
2. Put in a large bowl with the butter and icing sugar and beat until smooth and creamy.  I like to use a wooden spoon for this as I find it less messy.

To assemble -
Swirl or pipe the icing onto the cakes, you can afford to be generous here as this recipe gives plenty of icing.  Decorate as desired, I used strawberry, glimmer, crunchy nuggets, from Tesco.

Tuesday 11 June 2013

Apple and Sultana Loaf

I've been making this cake since I was a child, in fact the original recipe came from the kid's TV show, Blue Peter, in the early 80s!  I've converted it to metric for ease, and added some caramel icing, the recipe for which you'll find here, but it's fine without, and is the perfect accompaniment to a cup of tea.
Equipment -
900g loaf tin, lined

Ingredients -  
225g self raising flour
115g unsalted butter, diced
115g caster sugar
2 large eggs, beaten
Zest and juice of 1/2 lemon
Pinch of salt
85g sultanas
3 eating apples, peeled and cored (I use Granny Smith)

Method-
1. Preheat oven to 170C, 350F, gas4
2. Sift flour into bowl and rub in butter until it looks like breadcrumbs.
3. Mix in sugar, eggs, lemon and salt.
4. Mix in apples and sultanas.
5. Put mixture in the loaf tin, leveling the top and cover the tin with foil.
6. Bake for 1 1/2 hours, removing the foil for the last 15 mins to allow the cake to become golden.
7. Cool for 10 mins in the tin, then transfer to a wire rack to allow to cool completely.
8. Ice if desired, I think caramel icing goes well with this, but maple icing or cinnamon  buttercream would be nice too.

Monday 3 June 2013

Rhubarb and Custard Cupcakes

These may look innocent enough, but they have a hidden centre of rhubarb curd under that vanilla flavoured icing.  The sponges are a little different too, they're made with custard powder in the batter to give that real rhubarb and custard taste of a British summer.
If you don't want to make the curd, you could use rhubarb jam instead, but I can assure you, it's well worth a try if you fancy a go at something different.
 Equipment -
Electric whisk
Sugar thermometer
12 hole muffin tin lined with paper cases

Ingredients -

Rhubarb curd -
600g rhubarb
4 large, free range eggs
200g butter, diced
4 tsp cornflour
175g caster sugar

Sponges -
100g custard powder
200g butter, softened
2 large, free range eggs
4 tbsp milk
140g caster sugar
100g SR flour, sifted

Icing -
170g caster sugar
120ml water
4 free range egg yolks
300g butter, very soft but not runny
1 tsp vanilla bean paste

Method -

Rhubarb curd -
You'll find the recipe here.

Sponges -
1. Heat oven to 180C, fan 160C, gas 4.
2. Beat the custard powder with the eggs, sugar, milk and a tablespoon of the flour, using an electric whisk.
3. Divide between the cake cases and bake for about 20 mins, until golden and springy to the touch.
4. Leave to cool completely.

Icing -
1. Put the sugar and water in a small pan and heat gently, without boiling until the sugar dissolves.
2. Boil until temperature reads 110C on a sugar thermometer (5 mins or so).  Don't let it caramelize.
3. Put the egg yolks in a large bowl and whisk briefly.
4. Pour the sugar syrup  into the egg yolks with the electric whisk running, in a slow, steady stream.
5. Keep whisking until mixture is pale, thick, mousse like and totally cold.
6. Gradually whisk in the butter, followed by the vanilla.

To assemble -
Use a cupcake corer or apple corer to remove a plug of sponge from the centre of each cake.  Fill almost to the top with the curd.  Cut the crust off the removed plug and replace it to cover the hole.  Ice as desired, I used a piping bag fitted with a star nozzle and some sugar crystals.  I thought I had some more exciting decorations in the cupboard but was sadly mistaken!

Sunday 26 May 2013

Red Velvet Cupcakes

I was reminded last week, by a friend, in not too subtle a manner, (you know who you are!) that I hadn't made red velvet cupcakes in ages, so, red food colouring in hand, I got baking.  Please don't be put off by the vinegar in the sponge, you can't taste it and you need it for the acid/alkali reaction between it and the bicarb for the rise and texture, and there's just not enough acid in the buttermilk.  I decided against the usual cream cheese frosting and went with old fashioned American buttercream, which I usually use in my red velvet whoopie pies.  If you think icing made with flour and vegetable shortening sounds horrible, put those thoughts to one side and give it a try, it's actually rather good.
 The all important taste test!  Robbie tucks in and gives the thumbs up.
 Equipment -
12 hole muffin tin, lined with paper cases
Electric whisk

Ingredients -
Sponges -
60 g unsalted butter, softened
1 large, free range egg, beaten
10 g cocoa powder
1 tbsp good quality red food colouring paste or gel
1 tsp vanilla bean paste
120 ml buttermilk
150 g plain flour
1/2 tsp salt
1/2 tsp bicarbonate of soda
1 1/2 tsp white wine vinegar

Old Fashioned American Buttercream-
130 ml whole milk
4 tbsp plain flour
200 g caster sugar
110 g vegetable shortening eg. Cookeen
110 g butter, softened
2 tsp vanilla bean paste

Method -

Sponges -
1. Preheat oven to 170C
2. Beat butter and sugar together with electric whisk until light and fluffy.
3. Slowly add the egg and beat well.
4. In a separate bowl, mix the cocoa, food colouring and vanilla paste together, then add the sugar and butter mixture and beat well.
5. Beat in half the buttermilk.
6. Gradually beat in half the flour.
7. Beat in the reat of the buttermilk.
8. Gradually beat in the rest of the flour, until everything is well mixed.
9. Add the vinegar and bicarb and beat again.
10. Divide between the 12 paper cases and bake for around 20 mins or until the cakes are risen and springy to the touch.  Leave to cool before icing.

Icing -
1. Whisk together the flour and milk in a small saucepan. Place over a medium heat until the mixture thickens.  Set aside to cool.
2. In a bowl, beat together the sugar, butter and shortening until light and fluffy, using an electric whisk.  Add the vanilla and beat well.
3. Add the flour mixture and beat for a few more mins.

To Assemble -
Pipe or spread icing on top of the cooled cakes, I used a #4 star nozzle.  Decorate as desired, I used red sugar crystals.

Monday 20 May 2013

Milk Chocolate and Pistachio Squares

This is one of my husband's favourite cakes, it's moist, nutty and not too sweet (a bit like him!), and a recipe I keep coming back too.  It's from the BBC Good Food website, I originally found it in the Good Food magazine, which I buy every month.  You'll find the recipe here.
Before I tried the recipe, I was skeptical that the milk chocolate would be too bland, but my concerns were unfounded, dark chocolate would totally overpower the delicate flavour of the nuts and the soured cream in the frosting offsets some of the sweetness.

Monday 13 May 2013

Mile High Oreo Cake

This is a truly huge cake, and by that, I mean enormous, massive, gargantuan even!  It does taste good though!  Credit for the original recipe goes to Helen Costello, who suggests piping rosettes on the top of this cake to decorate.  I flat iced mine instead so that it would fit in my cake tin!

Equipment -
2 x 20cm springform cake tins, greased and base lined
Electric whisk
Food processor (optional)
Palette knife
Side scraper (optional)

Oven temp -
190C, Gas Mark 5

Ingredients -
Sponge -
225g butter, softened
600g golden caster sugar
7 egg whites 450g SR flour
1 tbsp vanilla bean paste
355ml milk
1x154g pack Oreo biscuits, crushed (some small chunks are fine.  I used a food processor but you could use a freezer bag and rolling pin)

Vanilla Butter Icing -
225g butter, softened
1 tsp vanilla bean paste
110ml milk
800g icing sugar

Method -
Sponge -
1. Preheat oven to 190C
2. Beat butter and sugar with electric whisk until light and fluffy.
3. Add egg whites one at a time, beating well after each addition, and adding a tablespoon of the flour with the last one to prevent curdling.
4. Add vanilla, then flour and milk alternately.  Stir in Oreos.
5. Divide mixture between the tins, spreading evenly.
6. Bake for around 50 mins, until and skewer inserted into the center comes out clean.  Leave to cool in the tins for ten mins, then turn out onto wire racks to cool completely.

Icing -
1. Mix butter and vanilla until smooth and creamy, then beat in milk and icing sugar alternately in three or four batches.  I prefer to do this by hand as, even on the slowest setting, my electric whisk redecorates my kitchen with icing sugar!

To assemble -
1. Place one cake on a plate and spread some icing over it and sandwich with the other cake.
2. Cover the top and sides of the cake in a thin "crumb layer" of icing and allow to set, this will give a neater finish.
3. Use the rest of the icing to cover the top and sides of the cake, using a palette knife and side scraper.
4. Decorate as desired, I used Belgian chocolate drops.

Friday 10 May 2013

Elderflower Cake

This one went down a storm with everyone who tried it, I'll certainly be making it again.  Credit for the recipe goes to Lynn Hill of the Clandestine Cake Club.
When choosing the elderflower cordial for this recipe, look at how much you have to dilute it to make a drink as they vary between one part cordial to four parts water, to one part cordial to ten parts water.  Obviously, you want to pick one which is very concentrated and which needs to be heavily diluted for a nice, intense flavour.
Equipment -
2 x 20cm round sandwich tins, greased and base lined
Electric whisk

Oven temp -
190C / Gas Mark 5

Ingredients -
Sponge -
4 large eggs, separated
230g caster sugar
2 tbsp elderflower cordial
130g SR flour

White Chocolate Ganache -
250g good quality white chocolate, finely chopped
250ml double cream

Elderflower Buttercream -
175g - butter, softened
175g - icing sugar
2 tbsp - elderflower cordial, or more to taste
Squeeze of lemon juice

Method -

Sponge -
1. Preheat oven to 190C.
2. Beat the egg yolks and 190g of the sugar using an electric whisk until mixture is light and fluffy and doubled in size (this may take 10 mins depending on how powerful your whisk is).
3. Mix in elderflower cordial.
4. In a clean bowl, whisk the egg whites until soft peaks form (make sure your beaters are properly clean too, any trace of grease will stop the maximum volume of air be whisked in).  Add remaining sugar and beat well.
5. Carefully fold half the egg whites into the yolk mixture, then sift in half the flour and gently fold that in too.  Repeat with the remaining egg white and flour.
6. Divide mixture between the two tins, spreading evenly.  Bake for about 25 mins, until a skewer inserted into the centre comes out clean. Leave to cool in the tin for a few mins, then turn out onto cooling racks and leaving to cool completely.

Ganache -
1. Place white choc in a bowl.  Heat the cream in a small pan until bubbling slightly round the edges.  Pour over the chocolate and stir until melted.
2. Cover with cling film a put in the fridge  until it has a soft spreading consistency.  (This may take around 4 hours)

Buttercream -
1. Beat the butter until light and fluffy, then gradually sift in the icing sugar and beat that in.
2. Mix in the cordial a little at a time, taste and a more if needed along with a squeeze of lemon juice.

To Assemble -
Sandwich the cakes with the buttercream, then spread the ganache over the top and sides.  Allow the icing time to set before slicing.

Monday 6 May 2013

Chocolate and Honeycomb Cupcakes

I think when I make this again I'll use a dark chocolate ganache instead of butter icing as I think the bitterness would offset the sweetness of the honeycomb.  The original recipe is from the Hummingbird Bakery Home, Sweet Home book, I just made a few tweaks.  The honeycomb starts to dissolve quite quickly, so these are best not made too far in advance.  If you don't want to make your own honeycomb, you could always use crushed up Crunchie bars.
Makes 16 cakes

Oven temp - 170C, 325F, Gas mark 3

Equipment -
2, 12 hole muffin tins, 16 of the holes lined with muffin cases.
Sugar thermometer 
Electric hand mixer
Baking tray lined with baking paper

Ingredients -
Sponge -
70g unsalted butter, softened
170g plain flour
250g golden caster sugar
50g cocoa powder
1 tbsp baking powder
0.5 tsp salt
210ml whole milk
2 large, free range eggs.

Honeycomb -
75g golden syrup
170 golden caster sugar
30ml water
1 tsp bicarbonate of soda

Icing -
450g icing sugar, sifted
60g cocoa powder, sifted
160g unsalted butter, softened
60ml whole milk

Method -
Sponge -
1. Preheat oven to 170C.
2. Using an electric hand mixer, whisk together the butter, flour, sugar, cocoa powder, baking powder and salt to a crumb-like consistency.
3. In a jug mix the milk and eggs together using a fork.
4. Using the electric whisk on a slow speed, gradually add half the wet mix to the dry.  When it is mixed in, increase speed and add remaining wet mix and whisk until well combined and lump free.
5. Spoon the mix into prepared tins, I used a 50ml ice cream scoop which I find the right size for cupcakes.
6. Bake for 20-25 mins or until the sponge is springy when lightly pressed.  Leave in tins for a few mins, then remove to a wire rack to cool completely.

Honeycomb -
1. In a large saucepan, mix the syrup, sugar and water together, then bring to the boil.  Do not stir the caramel or it may crystallise, just swirl the pan from time to time.  Boil to hard crack stage, about 150C on a sugar thermometer.
2. When it reaches the right temp, whisk in the bicarb (it will froth violently) and tip onto the prepared tray.
3. When completely cold, break into tiny pieces, I used a rolling pin.

Icing -
1. Whisk together all the icing ingredients until light and fluffy.
2. Stir in most of the honeycomb pieces, reserving some for decoration.
3. Swirl onto the cool sponges and sprinkle over reserved honeycomb.

Sunday 5 May 2013

My New Blog!

For the last few weeks I've been sharing the bakes I've made for my Monday night craft session with friends, on my papercraft blog and Facebook, and have often been asked for the recipes, so I decided to start this blog to do just that.
The first recipe I'm going to share is this one for Sticky Toffee Cake, which tastes as good as it sounds and is really easy to make.
Equipment -
A 25.5cmx20.5cm cake tin, base lined with baking paper

Oven temp -
180C / 350F / gas 4

Ingredients -
For the sponge -
200g stoned dates, chopped
1 tsp bicarbonate of soda
300ml boiling water
80g unsalted butter
160g light brown muscovado sugar
2 large free range eggs, at room temp, beaten
1 tsp vanilla extract or vanilla bean paste
175g SR flour
pinch of salt
75g walnut pieces

For the frosting -
100g light brown muscovado sugar
75g unsalted butter
100ml double cream
4 tbs mascarpone
pinch of sea salt
walnuts to decorate (optional)

Method -
1. Preheat oven to 180C.
To make the sponge, put dates in a saucepan, add bicarbonate of soda, pour over boiling water and simmer over a low heat for a minute.  Remove from heat and set aside for 15 mins.

2. Put butter in a mixing bowl and beat with a wooden spoon or electric mixer until creamy.  Add sugar and beat until fluffy, then gradually add eggs, beating well after each addition.  Beat in vanilla.  Sift flour and salt into the bowl and fold in.  Add the date mixture and walnuts and fold in.

3. Transfer mixture to prepared tin and spread evenly.  Bake for 25-30 mins until sponge feels springy when gently pressed in the middle.  Cool in the tin for 15 mins then turn out and leave to cool completely on a wire rack.

4. For the frosting, put the sugar, butter and cream in a saucepan and heat gently until melted, then increase heat and simmer for 3-4 mins until sticky.  Remove from the heat and let cool completely.  Beat mascarpone until smooth, then mix in caramel and salt.  Swirl over the top of the cake and decorate with walnuts if you like.